No edit summary Tag: rte-source |
m (Grammar correction) Tag: Visual edit |
||
| (215 intermediate revisions by 61 users not shown) | |||
| Line 1: | Line 1: | ||
{{Episodetabs|Biscuit Bungalow|Snoozy Strike}} |
{{Episodetabs|Biscuit Bungalow|Snoozy Strike}} |
||
{{Infobox episode |
{{Infobox episode |
||
| − | | banner = Biscuit-Bungalow.png |
||
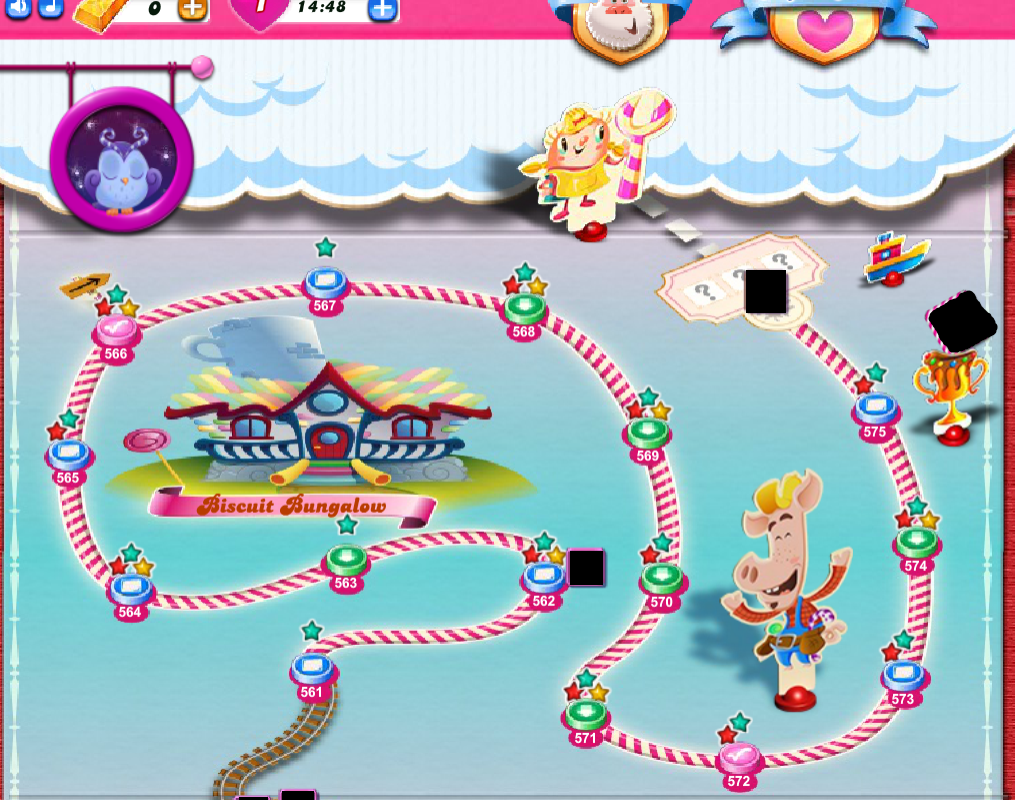
| image1 = Biscuit Bungalow Map.png |
| image1 = Biscuit Bungalow Map.png |
||
| − | | image2 = Biscuit Bungalow |
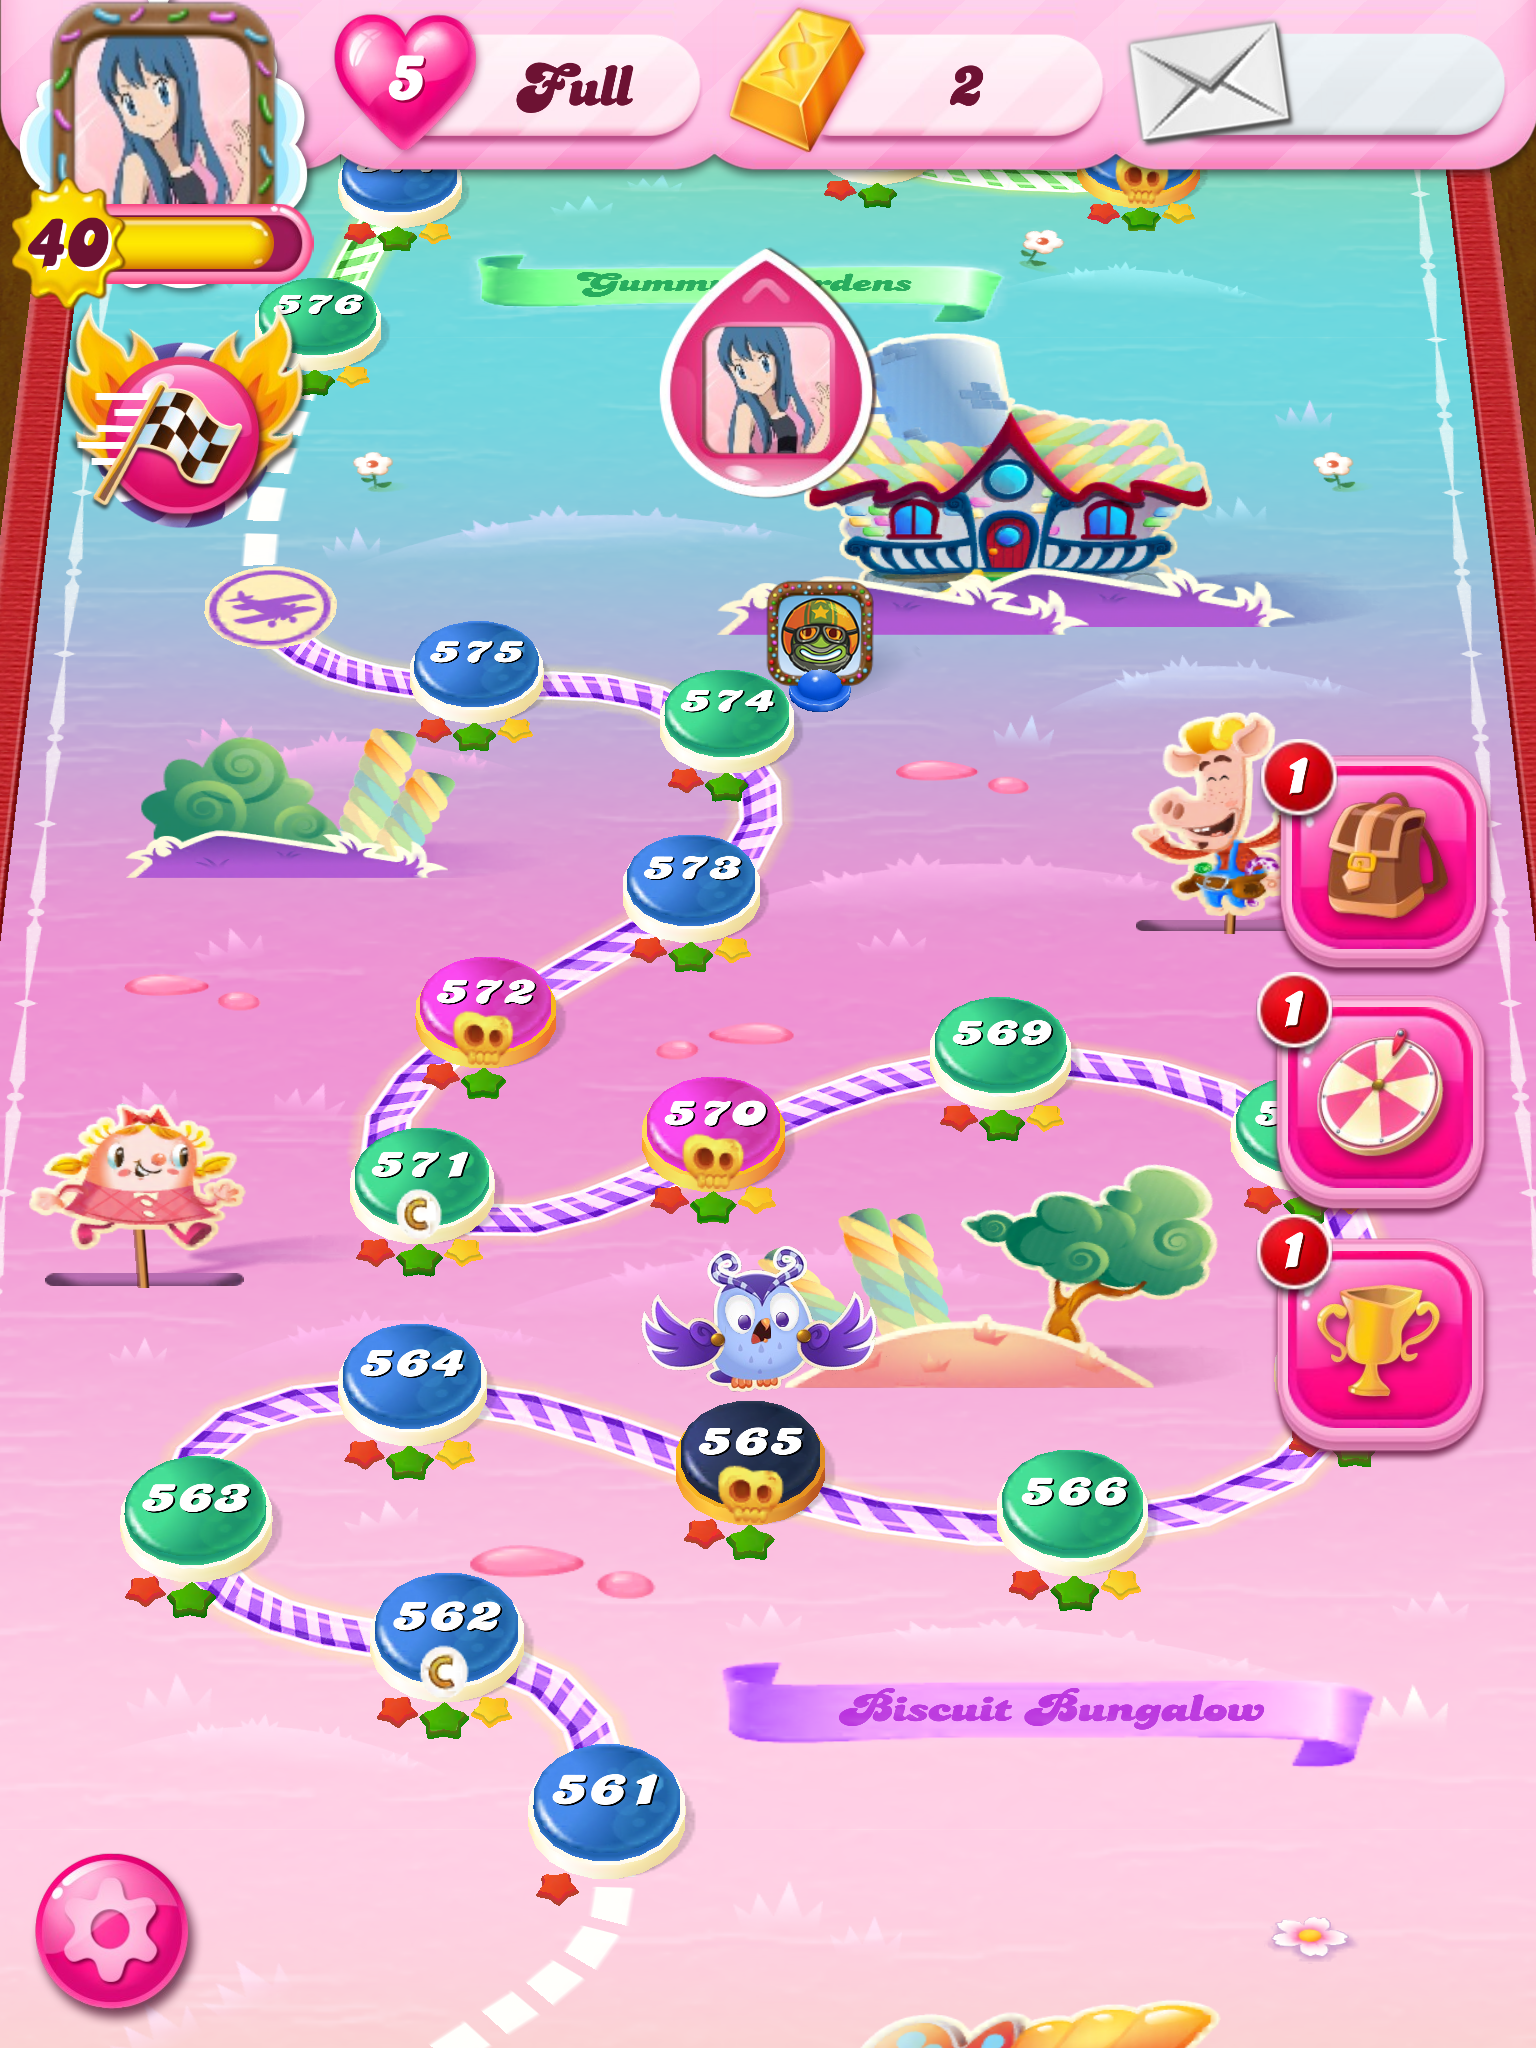
+ | | image2 = Biscuit Bungalow HTML5.png |
| + | | image3 = Episode39background.jpg |
||
| episode = 39 |
| episode = 39 |
||
| − | | characters = [[ |
+ | | characters = [[Pete]], [[Bubblegum Troll (character)|Bubblegum Troll]], and [[Misty]] |
| − | | champion = |
+ | | champion = Bubblegum Buster |
| − | | new = {{Other| |
+ | | new = {{Other|Conveyor Belt}} that can turn in corners <br/> |
| + | {{Other|Conveyor Belt}} without portals <br/> {{Other|CannonLBM}} (unofficial) <br/> {{Blocker|Two-layered Waffle}} in {{Other|CannonWa}} (unofficial) |
||
| ⚫ | |||
| − | | |
+ | | released = {{Web|14 April 2014}}<br />{{Mobile|7 May 2014}} |
| − | | |
+ | | difficulty = Somewhat Hard |
| − | | next = Gummy Gardens |
||
| − | | released = April 14, 2014 |
||
| − | | difficulty = Very hard |
||
}} |
}} |
||
| + | {{Episode Passage|39th|third|Seven|14 April 2014|Bubblegum Buster}} |
||
| − | '''Biscuit Bungalow''' is the 39th episode of ''[[Candy Crush Saga]]'' and the third episode of [[World Seven]]. This episode was released on April 14, 2014. The [[Champion Title|champion title]] for this episode is '''Bubblegum Buster'''. |
||
| − | |||
| − | Due to a great number of levels which are hard to pass, it is available to be voted as the [[Hardest Episode in the Game|hardest episode in the game]]. |
||
==Story== |
==Story== |
||
<poem> |
<poem> |
||
'''Before episode:''' |
'''Before episode:''' |
||
| − | A Bubblegum Monster blows up his giant bubblegum that blocks |
+ | A Bubblegum Monster blows up his giant bubblegum that blocks [[Pete]]'s way back to his bungalow. |
'''After episode:''' |
'''After episode:''' |
||
| − | [[Tiffi]] gets out of the screen then rides onto |
+ | [[Tiffi]] gets out of the screen then rides onto [[Misty]] of [[Minty Meadow (Episode 5)|Minty Meadow]]. The unicorn jumps and pops the bubble with her horn. |
</poem> |
</poem> |
||
==New things== |
==New things== |
||
| + | *[[Conveyor Belt]]s can turn on corners for the first time in [[level 561]]. |
||
| − | There is technically no new element. However, in this episode, '''[[Conveyor Belt|conveyor belts]]''' '''have corners for the first time''', so that candies could turn to the other side during the game. Conveyor belts have corners in every level in this episode except for levels 568, 569, 571, and 572. This could be considered as a new addition, though no actual new elements were added at this point as the conveyor belts that have corners are still just conveyor belts. |
||
| + | **It's also the first level where conveyor belts don't have portals, since this element goes around in a continuous loop. |
||
| − | |||
| + | *Liquorice swirl + candy bomb + mystery candy cannon is unofficially introduced in [[level 567]], due to redesigning. |
||
| − | ==Guide== |
||
| + | *Waffle cannons can spawn two-layered waffles for the first time in [[level 572]], due to redesigning. |
||
| − | <imap map-id="6475"></imap> |
||
==Levels== |
==Levels== |
||
| − | + | {{Contain Levels|Reality 39|561|575}} |
|
| − | |||
| − | This episode contains levels 561-575. |
||
| − | |||
| ⚫ | Biscuit Bungalow continues the trend of having conveyor belts in all 15 levels, having a normal amount of jelly and ingredients levels, |
||
| ⚫ | Biscuit Bungalow continues the trend of having conveyor belts in all 15 levels, having a normal amount of jelly and ingredients levels, a low number of candy order levels, and no new elements. No [[Liquorice Lock|liquorice locks]], [[Cake Bomb|cake bombs]], nor [[Chameleon Candy|chameleon candies]] make an appearance either. They can only be found inside some of the [[Mystery Candy|mystery candies]]. |
||
| − | This is the hardest episode in World Seven. It has four somewhat hard-hard levels: [[Level 568|568]], [[Level 570|570]], [[Level 571|571]], and [[Level 575|575]], three very hard levels: [[Level 565|565]], [[Level 567|567]], and [[Level 573|573]], and one insanely hard level: [[Level 566|566]]. Yet, there are five easy levels: [[Level 563|563]], [[Level 564|564]], [[Level 569|569]], 572, and [[Level 574|574]]. As a result, this is a very hard episode. This episode is much more difficult than the previous episode, [[Jelly Wagon]]. |
||
| + | While many levels are easy, these levels can pose a challenge: {{P|567}}, {{P|571}}, {{P|572}}, {{P|573}} and {{P|575}}. Hence, this is a somewhat hard episode, with a mean of 4.27, and is much harder than the previous episode, [[Jelly Wagon]]. It is also the hardest episode of World Seven. |
||
| − | {{Episodelevels|Moves = None|Jelly = 7|Ingredient = 6|Timed = None|Candy Order = 2|easiest = [[Level 572]]|hardest = [[Level 566]]|mostfun = ??}} |
||
| + | {{Episodelevels |
||
| ⚫ | |||
| ⚫ | |||
| ⚫ | |||
| + | | Jelly = 7 |
||
| + | | Ingredients = 6 |
||
| + | | Candy Order = 2 |
||
| + | | Mixed = - |
||
| + | | easiest = [[Level 566]] |
||
| + | | hardest = [[Level 572]] |
||
| + | | mostfun = [[Level 561]] |
||
| + | }} |
||
| + | {{Colourlevels |
||
| + | | Level #1 = - |
||
| + | | Level #2 = 0 |
||
| + | | Level #3 = 4 |
||
| + | | Level #4 = 11 |
||
| + | }} |
||
| + | {{Sugar Drop Levels |
||
| + | | Level #1 = 562 |
||
| + | | Level type 1 = Jelly |
||
| + | | Level #2 = 565 |
||
| + | | Level type 2 = Jelly |
||
| + | | Level #3 = 571 |
||
| + | | Level type 3 = Ingredients |
||
| + | }} |
||
| + | {{Hexagon Levels Sync |
||
| + | | ep = 39 |
||
| + | }} |
||
| ⚫ | |||
| + | | none = 0 |
||
| + | | very easy = 0 |
||
| + | | easy = 1 |
||
| + | | somewhat easy = 6 |
||
| + | | medium = 3 |
||
| + | | somewhat hard = 1 |
||
| + | | hard = 2 |
||
| + | | very hard = 1 |
||
| + | | extremely hard = 1 |
||
| + | | nearly impossible = 0 |
||
| + | | variable = 0 |
||
| + | }} |
||
| ⚫ | |||
|- |
|- |
||
| − | |style="text-align:center; background-color:#a81b79; color:white; width:2%"| |
+ | | style="text-align:center; background-color:#a81b79; color:white; width:2%" | |
| − | ! scope="col" style="text-align:center; background-color:#a81b79; color:white; width:7%;"|[[Levels|<font color="white">Level</font>]] |
+ | ! scope="col" style="text-align:center; background-color:#a81b79; color:white; width:7%;" |[[Levels|<font color="white">Level</font>]] |
| − | ! scope="col" style="text-align:center; background-color:#a81b79; color:white; width:6%;"|[[Level Types|<font color="white">Type</font>]] |
+ | ! scope="col" style="text-align:center; background-color:#a81b79; color:white; width:6%;" |[[Level Types|<font color="white">Type</font>]] |
| − | ! scope="col" style="text-align:center; background-color:#a81b79; color:white; width:8%;"|[[Moves|<font color="white">Moves</font>]] |
+ | ! scope="col" style="text-align:center; background-color:#a81b79; color:white; width:8%;" |[[Moves|<font color="white">Moves</font>]] |
| − | ! scope="col" style="text-align:center; background-color:#a81b79; color:white; width:13%;"|[[Target Score|<font color="white">Target score</font>]] |
+ | ! scope="col" style="text-align:center; background-color:#a81b79; color:white; width:13%;" |[[Target Score|<font color="white">Target score</font>]] |
| − | ! scope="col" style="text-align:center; background-color:#a81b79; color:white; width:23%;"|Goal |
+ | ! scope="col" style="text-align:center; background-color:#a81b79; color:white; width:23%;" |Goal |
| − | ! scope="col" style="text-align:center; background-color:#a81b79; color:white; width:16%;"|Walkthrough |
+ | ! scope="col" style="text-align:center; background-color:#a81b79; color:white; width:16%;" |Walkthrough |
| − | ! scope="col" style="text-align:center; background-color:#a81b79; color:white; width:33%;"|Remarks |
+ | ! scope="col" style="text-align:center; background-color:#a81b79; color:white; width:33%;" |Remarks |
|- |
|- |
||
| style="background-color:{{B|561}};" | |
| style="background-color:{{B|561}};" | |
||
| − | | style="text-align:center;"|{{P|561}} |
+ | | style="text-align:center;" |{{P|561}} |
| − | | style="text-align:center;"|{{Type|Jelly}} |
+ | | style="text-align:center;" |{{Type|Jelly}} |
| − | | style="text-align:center;"| |
+ | | style="text-align:center;" |{{Moves|30}} |
| − | | style="text-align:center;"|100,000 |
+ | | style="text-align:center;" |100,000 |
| − | | style="text-align:center;"|{{Jelly|| |
+ | | style="text-align:center;" |{{Jelly||65}} |
| − | | style="text-align:center;" |
+ | | style="text-align:center;" | |
| − | | style="text-align:center;"| |
+ | | style="text-align:center;" | |
|- |
|- |
||
| style="background-color:{{B|562}};" | |
| style="background-color:{{B|562}};" | |
||
| − | | style="text-align:center;"|{{P|562}} |
+ | | style="text-align:center;" |{{P|562}} |
| − | | style="text-align:center;"|{{Type|Jelly}} |
+ | | style="text-align:center;" |{{Type|Jelly}} |
| − | | style="text-align:center;"|45 |
+ | | style="text-align:center;" |{{Moves|45}} |
| − | | style="text-align:center;"|100,000 |
+ | | style="text-align:center;" |100,000 |
| − | | style="text-align:center;"|{{Jelly||36}} |
+ | | style="text-align:center;" |{{Jelly||36}} |
| − | | style="text-align:center;" |
+ | | style="text-align:center;" | |
| − | | style="text-align:center;"| |
+ | | style="text-align:center;" |Similar to [[level 549]] |
|- |
|- |
||
| style="background-color:{{B|563}};" | |
| style="background-color:{{B|563}};" | |
||
| − | | style="text-align:center;"|{{P|563}} |
+ | | style="text-align:center;" |{{P|563}} |
| − | | style="text-align:center;"|{{Type|Ingredients}} |
+ | | style="text-align:center;" |{{Type|Ingredients}} |
| − | | style="text-align:center;"| |
+ | | style="text-align:center;" |{{Moves|22}} |
| − | | style="text-align:center;"|100,000 |
+ | | style="text-align:center;" |100,000 |
| − | | style="text-align:center;"|{{ |
+ | | style="text-align:center;" |{{Ingredients||5}} |
| − | | style="text-align:center;" |
+ | | style="text-align:center;" | |
| − | | style="text-align:center;"| |
+ | | style="text-align:center;" | |
|- |
|- |
||
| style="background-color:{{B|564}};" | |
| style="background-color:{{B|564}};" | |
||
| − | | style="text-align:center;"|{{P|564}} |
+ | | style="text-align:center;" |{{P|564}} |
| − | | style="text-align:center;"|{{Type|Jelly}} |
+ | | style="text-align:center;" |{{Type|Jelly}} |
| − | | style="text-align:center;"| |
+ | | style="text-align:center;" |{{Moves|28}} |
| − | | style="text-align:center;"|90,000 |
+ | | style="text-align:center;" |90,000 |
| − | | style="text-align:center;"|{{Jelly||42}} |
+ | | style="text-align:center;" |{{Jelly||42}} |
| − | | style="text-align:center;" |
+ | | style="text-align:center;" | |
| − | | style="text-align:center;"| |
+ | | style="text-align:center;" | |
|- |
|- |
||
| style="background-color:{{B|565}};" | |
| style="background-color:{{B|565}};" | |
||
| − | | style="text-align:center;"|{{P|565}} |
+ | | style="text-align:center;" |{{P|565}} |
| − | | style="text-align:center;"|{{Type|Jelly}} |
+ | | style="text-align:center;" |{{Type|Jelly}} |
| − | | style="text-align:center;"| |
+ | | style="text-align:center;" |{{Moves|30}} |
| − | | style="text-align:center;"|300,000 |
+ | | style="text-align:center;" |300,000 |
| − | | style="text-align:center;"|{{Jelly||79}} |
+ | | style="text-align:center;" |{{Jelly||79}} |
| − | | style="text-align:center;" |
+ | | style="text-align:center;" | |
| − | | style="text-align:center;"| |
+ | | style="text-align:center;" | |
|- |
|- |
||
| style="background-color:{{B|566}};" | |
| style="background-color:{{B|566}};" | |
||
| − | | style="text-align:center;"|{{P|566}} |
+ | | style="text-align:center;" |{{P|566}} |
| − | | style="text-align:center;"|{{Type| |
+ | | style="text-align:center;" |{{Type|Ingredients}} |
| − | | style="text-align:center;"| |
+ | | style="text-align:center;" |{{Moves|22}} |
| − | | style="text-align:center;"|50,000 |
+ | | style="text-align:center;" |50,000 |
| − | | style="text-align:center;"|{{ |
+ | | style="text-align:center;" |{{Ingredients|3}} |
| − | | style="text-align:center;" |
+ | | style="text-align:center;" | |
| − | | style="text-align:center;"| |
+ | | style="text-align:center;" |Switched level with 570 |
|- |
|- |
||
| style="background-color:{{B|567}};" | |
| style="background-color:{{B|567}};" | |
||
| − | | style="text-align:center;"|{{P|567}} |
+ | | style="text-align:center;" |{{P|567}} |
| − | | style="text-align:center;"|{{Type|Jelly}} |
+ | | style="text-align:center;" |{{Type|Jelly}} |
| − | | style="text-align:center;"| |
+ | | style="text-align:center;" |{{Moves|35}} |
| − | | style="text-align:center;"|200,000 |
+ | | style="text-align:center;" |200,000 |
| − | | style="text-align:center;"|{{Jelly||67}} |
+ | | style="text-align:center;" |{{Jelly||67}} |
| − | | style="text-align:center;" |
+ | | style="text-align:center;" | |
| − | | style="text-align:center;"| |
+ | | style="text-align:center;" | |
|- |
|- |
||
| style="background-color:{{B|568}};" | |
| style="background-color:{{B|568}};" | |
||
| − | | style="text-align:center;"|{{P|568}} |
+ | | style="text-align:center;" |{{P|568}} |
| − | | style="text-align:center;"|{{Type|Ingredients}} |
+ | | style="text-align:center;" |{{Type|Ingredients}} |
| − | | style="text-align:center;"| |
+ | | style="text-align:center;" |{{Moves|25}} |
| − | | style="text-align:center;"|50,000 |
+ | | style="text-align:center;" |50,000 |
| − | | style="text-align:center;"|{{ |
+ | | style="text-align:center;" |{{Ingredients|1|1}} |
| − | | style="text-align:center;" |
+ | | style="text-align:center;" | |
| − | | style="text-align:center;"| |
+ | | style="text-align:center;" | |
|- |
|- |
||
| style="background-color:{{B|569}};" | |
| style="background-color:{{B|569}};" | |
||
| − | | style="text-align:center;"|{{P|569}} |
+ | | style="text-align:center;" |{{P|569}} |
| − | | style="text-align:center;"|{{Type|Ingredients}} |
+ | | style="text-align:center;" |{{Type|Ingredients}} |
| − | | style="text-align:center;"|35 |
+ | | style="text-align:center;" |{{Moves|35}} |
| − | | style="text-align:center;"|70,000 |
+ | | style="text-align:center;" |70,000 |
| − | | style="text-align:center;"|{{ |
+ | | style="text-align:center;" |{{Ingredients|3|3}} |
| − | | style="text-align:center;"|[[File:Candy Crush Saga Level 569|thumb|center|200px]] |
+ | | style="text-align:center;" |[[File:Candy Crush Saga Level 569|thumb|center|200px]] |
| − | | style="text-align:center;"| |
+ | | style="text-align:center;" | |
|- |
|- |
||
| style="background-color:{{B|570}};" | |
| style="background-color:{{B|570}};" | |
||
| − | | style="text-align:center;"|{{P|570}} |
+ | | style="text-align:center;" |{{P|570}} |
| − | | style="text-align:center;"|{{Type| |
+ | | style="text-align:center;" |{{Type|Candy Order}} |
| − | | style="text-align:center;"|30 |
+ | | style="text-align:center;" |{{Moves|30}} |
| − | | style="text-align:center;"|50,000 |
+ | | style="text-align:center;" |50,000 |
| − | | style="text-align:center;"|{{ |
+ | | style="text-align:center;" |{{Order|wrapped|10|blue|50}} |
| − | | style="text-align:center;" |
+ | | style="text-align:center;" | |
| − | | style="text-align:center;"| |
+ | | style="text-align:center;" | |
|- |
|- |
||
| style="background-color:{{B|571}};" | |
| style="background-color:{{B|571}};" | |
||
| − | | style="text-align:center;"|{{P|571}} |
+ | | style="text-align:center;" |{{P|571}} |
| − | | style="text-align:center;"|{{Type|Ingredients}} |
+ | | style="text-align:center;" |{{Type|Ingredients}} |
| − | | style="text-align:center;"| |
+ | | style="text-align:center;" |{{Moves|25}} |
| − | | style="text-align:center;"|40,000 |
+ | | style="text-align:center;" |40,000 |
| − | | style="text-align:center;"|{{ |
+ | | style="text-align:center;" |{{Ingredients|2|2}} |
| − | | style="text-align:center;" |
+ | | style="text-align:center;" | |
| − | | style="text-align:center;"| |
+ | | style="text-align:center;" | |
|- |
|- |
||
| style="background-color:{{B|572}};" | |
| style="background-color:{{B|572}};" | |
||
| − | | style="text-align:center;"|{{P|572}} |
+ | | style="text-align:center;" |{{P|572}} |
| − | | style="text-align:center;"|{{Type|Candy Order}} |
+ | | style="text-align:center;" |{{Type|Candy Order}} |
| − | | style="text-align:center;"|30 |
+ | | style="text-align:center;" |{{Moves|30}} |
| − | | style="text-align:center;"|20,000 |
+ | | style="text-align:center;" |20,000 |
| − | | style="text-align:center;"|{{Order| |
+ | | style="text-align:center;" |{{Order|waffle|52|icing|10|liquorice swirl|4}} |
| − | | style="text-align:center;" |
+ | | style="text-align:center;" | |
| − | | style="text-align:center;"| |
+ | | style="text-align:center;" | |
|- |
|- |
||
| style="background-color:{{B|573}};" | |
| style="background-color:{{B|573}};" | |
||
| − | | style="text-align:center;"|{{P|573}} |
+ | | style="text-align:center;" |{{P|573}} |
| − | | style="text-align:center;"|{{Type|Jelly}} |
+ | | style="text-align:center;" |{{Type|Jelly}} |
| − | | style="text-align:center;"|30 |
+ | | style="text-align:center;" |{{Moves|30}} |
| − | | style="text-align:center;"|150,000 |
+ | | style="text-align:center;" |150,000 |
| − | | style="text-align:center;"|{{Jelly||66}} |
+ | | style="text-align:center;" |{{Jelly||66}} |
| − | | style="text-align:center;" |
+ | | style="text-align:center;" | |
| − | | style="text-align:center;"| |
+ | | style="text-align:center;" | |
|- |
|- |
||
| style="background-color:{{B|574}};" | |
| style="background-color:{{B|574}};" | |
||
| − | | style="text-align:center;"|{{P|574}} |
+ | | style="text-align:center;" |{{P|574}} |
| − | | style="text-align:center;"|{{Type|Ingredients}} |
+ | | style="text-align:center;" |{{Type|Ingredients}} |
| − | | style="text-align:center;"| |
+ | | style="text-align:center;" |{{Moves|30}} |
| − | | style="text-align:center;"|100,000 |
+ | | style="text-align:center;" |100,000 |
| − | | style="text-align:center;"|{{ |
+ | | style="text-align:center;" |{{Ingredients|4|4}} |
| − | | style="text-align:center;" |
+ | | style="text-align:center;" | |
| − | | style="text-align:center;"| |
+ | | style="text-align:center;" | |
|- |
|- |
||
| style="background-color:{{B|575}};" | |
| style="background-color:{{B|575}};" | |
||
| − | | style="text-align:center;"|{{P|575}} |
+ | | style="text-align:center;" |{{P|575}} |
| − | | style="text-align:center;"|{{Type|Jelly}} |
+ | | style="text-align:center;" |{{Type|Jelly}} |
| − | | style="text-align:center;"|35 |
+ | | style="text-align:center;" |{{Moves|35}} |
| − | | style="text-align:center;"| |
+ | | style="text-align:center;" |145,000 |
| − | | style="text-align:center;"|{{Jelly||50}} |
+ | | style="text-align:center;" |{{Jelly||50}} |
| − | | style="text-align:center;" |
+ | | style="text-align:center;" | |
| − | | style="text-align:center;"| |
+ | | style="text-align:center;" | |
|} |
|} |
||
==Gallery== |
==Gallery== |
||
| − | <verbatim>TabberCSS</verbatim> |
||
<tabber> |
<tabber> |
||
|-| |
|-| |
||
| − | Story |
+ | Story= |
<gallery> |
<gallery> |
||
BiscuitBungalowBBGTroll.png|I'll huff, and I'll puff, and I will encase your house in gum! |
BiscuitBungalowBBGTroll.png|I'll huff, and I'll puff, and I will encase your house in gum! |
||
| Line 205: | Line 234: | ||
|-| |
|-| |
||
Levels= |
Levels= |
||
| − | <gallery navigation="true |
+ | <gallery navigation="true"> |
| − | + | Level 561 V3 HTML5.png|Level 561 - {{Type|Jelly}}|link=Level 561 |
|
| − | + | Level 562 V3 HTML5.png|Level 562 - {{Type|Jelly}}|link=Level 562 |
|
| − | Level 563.png|Level 563 - {{Type|Ingredients}}|link=Level 563 |
+ | Level 563 V3 HTML5.png|Level 563 - {{Type|Ingredients}}|link=Level 563 |
| − | Level 564.png|Level 564 - {{Type|Jelly}}|link=Level 564 |
+ | Level 564 V4 HTML5.png|Level 564 - {{Type|Jelly}}|link=Level 564 |
| − | Level 565.png|Level 565 - {{Type|Jelly}}|link=Level 565 |
+ | Level 565 V4 HTML5.png|Level 565 - {{Type|Jelly}}|link=Level 565 |
| − | Level 566.png|Level 566 - {{Type| |
+ | Level 566 V4 HTML5.png|Level 566 - {{Type|Ingredients}}|link=Level 566 |
| − | Level 567.png|Level 567 - {{Type|Jelly}}|link=Level 567 |
+ | Level 567 V4 HTML5.png|Level 567 - {{Type|Jelly}}|link=Level 567 |
| − | Level 568.png|Level 568 - {{Type| |
+ | Level 568 V4 HTML5.png|Level 568 - {{Type|Ingredients}}|link=Level 568 |
| − | Level 569.png|Level 569 - {{Type| |
+ | Level 569 Reality.png|Level 569 - {{Type|Ingredients}}|link=Level 569 |
| − | Level 570.png|Level 570 - {{Type| |
+ | Level 570 V5 HTML5.png|Level 570 - {{Type|Candy Order}}|link=Level 570 |
| − | Level 571.png|Level 571 - {{Type| |
+ | Level 571 V2 HTML5.png|Level 571 - {{Type|Ingredients}}|link=Level 571 |
| − | Level 572.png|Level 572 - {{Type|Candy Order}}|link=Level 572 |
+ | Level 572 V5 HTML5.png|Level 572 - {{Type|Candy Order}}|link=Level 572 |
| − | Level 573.png|Level 573 - {{Type|Jelly}}|link=Level 573 |
+ | Level 573 V2 HTML5.png|Level 573 - {{Type|Jelly}}|link=Level 573 |
| − | Level 574.png|Level 574 - {{Type| |
+ | Level 574 V4 HTML5.png|Level 574 - {{Type|Ingredients}}|link=Level 574 |
| − | Level 575.png|Level 575 - {{Type|Jelly}}|link=Level 575 |
+ | Level 575 V2 HTML5.png|Level 575 - {{Type|Jelly}}|link=Level 575 |
</gallery> |
</gallery> |
||
|-| |
|-| |
||
Champion title= |
Champion title= |
||
<gallery> |
<gallery> |
||
| − | Bubblegum Buster.png|Champion title |
+ | Bubblegum Buster.png|Champion title|link=Bubblegum Buster |
| + | </gallery> |
||
| + | |-| |
||
| + | Icon= |
||
| + | <gallery> |
||
| + | Biscuitbungalow.png|Episode icon |
||
| + | </gallery> |
||
| + | |-| |
||
| + | Miscellaneous= |
||
| + | <gallery> |
||
| + | Ep39promopic.png|Coming soon poster |
||
| + | Ep39releasedpic.png|After release poster |
||
| + | </gallery> |
||
| + | |-| |
||
| + | Old map= |
||
| + | <gallery> |
||
| + | Biscuit Bungalow Map Mobile.png|Old Mobile/HTML5 map |
||
</gallery> |
</gallery> |
||
</tabber> |
</tabber> |
||
==Trivia== |
==Trivia== |
||
| − | [[File:Biscuit-Bungalow (old).png|thumb|Old name colour in the episode banner |
+ | [[File:Biscuit-Bungalow (old).png|thumb|Old name colour in the episode banner]] |
| + | *This episode is the third episode to be released on a Monday; the first was [[Pearly White Plains]] and the second was [[Polkapalooza (Episode 28)]]. |
||
| − | {{Episode Alliteration}} |
||
| + | **Hence, this broke off a short trend of releasing episodes on Wednesdays. Nevertheless, it was resumed in the [[Gummy Gardens|next episode]]. |
||
| − | *This episode was released on the same date as [[Sweet Dreams]] in [[Dreamworld]]. |
||
| − | *This |
+ | *This is the third episode that is based on one of the fairy tales, ''Three Little Pigs''. The first fairy tale based episode is [[Gingerbread Glade]], which is based on ''Hansel and Gretel'', and the second is [[Candy Clouds (Episode 20)|Candy Clouds]], which is based on ''Jack and the Beanstalk''. |
| + | *With four [[Ingredients Levels|ingredient levels]] in a row, this is the first episode in Reality where there are more than two ingredients levels in a row. |
||
| − | *This episode is based on the fable - Three Little Pigs. |
||
| − | * |
+ | **Prior to Dreamworld's removal, it broke [[Dizzy Dessert]]'s record of having three ingredient levels in a row. |
| ⚫ | |||
| − | *This is the first episode by alphabetical order in [[reality]]. |
||
| ⚫ | |||
*This episode's pathway is the same as the one from [[Pudding Pagoda]]. |
*This episode's pathway is the same as the one from [[Pudding Pagoda]]. |
||
| + | *This episode doesn't have any level with 6 colours before it was removed. |
||
| − | *This is the fourth episode in a row to be released faster than [[Ice Cream Caves]] (it took 71 days for it to come out). |
||
| ⚫ | |||
| − | *This episode doesn't have any level with 6 colours. However, it is different than [[Sour Salon]] as there are two levels with 4 colours (Levels 569 and 574). |
||
| ⚫ | |||
*This episode continues the trend of having conveyor belts in all 15 levels for the 3rd episode in the row. |
*This episode continues the trend of having conveyor belts in all 15 levels for the 3rd episode in the row. |
||
*This is the 2nd episode in a row to be released in a span of 2 weeks. |
*This is the 2nd episode in a row to be released in a span of 2 weeks. |
||
| − | *This episode continues the trend of having no toffee tornadoes since it was introduced in [[Soda Swamp (Episode 29)]]. |
||
*This episode continues the trend of having no [[Liquorice Lock|liquorice locks]]. |
*This episode continues the trend of having no [[Liquorice Lock|liquorice locks]]. |
||
| − | *The level types are the same as Ice Cream Caves with '''7''' |
+ | *The level types are the same as Ice Cream Caves, with '''7''' Jelly levels, '''6''' Ingredients levels, and '''2''' Candy Order levels. |
| − | *This episode has two 3-in-a-row levels that contain [[Candy Bomb|candy bombs]] in this episode. Some of the first 3-in-a-row levels are |
+ | *This episode has two 3-in-a-row levels that contain [[Candy Bomb|candy bombs]] in this episode. Some of the first 3-in-a-row levels are levels 565, 566, and 567. The second ones are 573, 574, and 575. |
| − | *This is also the 6th consecutive episode that ends with a 5-coloured level, |
+ | *This is also the 6th consecutive episode that ends with a 5-coloured level, 575. |
| − | *This used to be the second episode with 5 very hard levels. |
+ | *This used to be the second episode with 5 very hard levels. The first being [[Rainbow Runway]]. |
| + | **However, a nerf at 562 caused the number of very hard levels to decrease to four. They are levels 565, 566, 567, and 573. After some redesigns, only one remains: 573. |
||
| + | *This episode's background, map texture and story is reused for [[Marshmallow Mansion]]. |
||
{{EpisodesNav}} |
{{EpisodesNav}} |
||
| − | [[Category: |
+ | [[Category:Episodes released in 2014]] |
| − | [[Category: |
+ | [[Category:Hard episodes]] |
| ⚫ | |||
| − | [[Category:Released Episodes of 2014]] |
||
[[Category:Very hard episodes]] |
[[Category:Very hard episodes]] |
||
| ⚫ | |||
| + | [[Category:Episodes with Bubblegum Troll]] |
||
Revision as of 17:34, 9 July 2020
| Reality | Dreamworld |
|---|
| Episode | 39 |
|---|---|
| World (Flash) | 7 |
| World (HTML5) | 8 |
| Levels | 561-575 |
| Characters | Pete, Bubblegum Troll, and Misty |
| Champion title | Bubblegum Buster |
| New features |
|
| Release date | |
| Difficulty | Somewhat Hard |
| Previous | Next |

Biscuit Bungalow is the 39th episode in Candy Crush Saga and the third episode of World Seven. This episode was released on 14 April 2014. The champion title for this episode is Bubblegum Buster.
Story
Before episode:
A Bubblegum Monster blows up his giant bubblegum that blocks Pete's way back to his bungalow.
After episode:
Tiffi gets out of the screen then rides onto Misty of Minty Meadow. The unicorn jumps and pops the bubble with her horn.
New things
- Conveyor Belts can turn on corners for the first time in level 561.
- It's also the first level where conveyor belts don't have portals, since this element goes around in a continuous loop.
- Liquorice swirl + candy bomb + mystery candy cannon is unofficially introduced in level 567, due to redesigning.
- Waffle cannons can spawn two-layered waffles for the first time in level 572, due to redesigning.
Levels


This episode contains levels 561-575.
Biscuit Bungalow continues the trend of having conveyor belts in all 15 levels, having a normal amount of jelly and ingredients levels, a low number of candy order levels, and no new elements. No liquorice locks, cake bombs, nor chameleon candies make an appearance either. They can only be found inside some of the mystery candies.
While many levels are easy, these levels can pose a challenge: 567, 571, 572, 573 and 575. Hence, this is a somewhat hard episode, with a mean of 4.27, and is much harder than the previous episode, Jelly Wagon. It is also the hardest episode of World Seven.
| 7 | 6 | 2 | - |
| The easiest : Level 566 |
The hardest : Level 572 |
| 4 |
5 |
|---|---|
| 4 | 11 |
| Level 562 | Level 565 | |||||||||||||
Difficulty code summary (details here)
None • Very Easy • Easy • Somewhat Easy • Medium • Somewhat Hard • Hard • Very Hard • Extremely Hard • Nearly Impossible • Variable
| 0 | 0 | 1 | 6 | 3 | 1 | 2 | 1 | 1 | 0 | 0 |
| Level | Type | Moves | Target score | Goal | Walkthrough | Remarks | |
|---|---|---|---|---|---|---|---|
| 561 | 100,000 | ||||||
| 562 | 100,000 | Similar to level 549 | |||||
| 563 | 100,000 | ||||||
| 564 | 90,000 | ||||||
| 565 | 300,000 | ||||||
| 566 | 50,000 | Switched level with 570 | |||||
| 567 | 200,000 | ||||||
| 568 | 50,000 | ||||||
| 569 | 70,000 | ||||||
| 570 | 50,000 | ||||||
| 571 | 40,000 | ||||||
| 572 | 20,000 | ||||||
| 573 | 150,000 | ||||||
| 574 | 100,000 | ||||||
| 575 | 145,000 |

Gallery
")
")
")
")
")
")
")
")
")
")
")
")
")
")
")
")
")
")
Trivia


.png)
Old name colour in the episode banner
- This episode is the third episode to be released on a Monday; the first was Pearly White Plains and the second was Polkapalooza (Episode 28).
- Hence, this broke off a short trend of releasing episodes on Wednesdays. Nevertheless, it was resumed in the next episode.
- This is the third episode that is based on one of the fairy tales, Three Little Pigs. The first fairy tale based episode is Gingerbread Glade, which is based on Hansel and Gretel, and the second is Candy Clouds, which is based on Jack and the Beanstalk.
- With four ingredient levels in a row, this is the first episode in Reality where there are more than two ingredients levels in a row.
- Prior to Dreamworld's removal, it broke Dizzy Dessert's record of having three ingredient levels in a row.
- This episode continues the trend of having no timed levels, before they were removed.
- This episode's pathway is the same as the one from Pudding Pagoda.
- This episode doesn't have any level with 6 colours before it was removed.
- Like Ice Cream Caves and Sticky Savannah, there are only two candy order levels.
- This episode continues the trend of having conveyor belts in all 15 levels for the 3rd episode in the row.
- This is the 2nd episode in a row to be released in a span of 2 weeks.
- This episode continues the trend of having no liquorice locks.
- The level types are the same as Ice Cream Caves, with 7 Jelly levels, 6 Ingredients levels, and 2 Candy Order levels.
- This episode has two 3-in-a-row levels that contain candy bombs in this episode. Some of the first 3-in-a-row levels are levels 565, 566, and 567. The second ones are 573, 574, and 575.
- This is also the 6th consecutive episode that ends with a 5-coloured level, 575.
- This used to be the second episode with 5 very hard levels. The first being Rainbow Runway.
- However, a nerf at 562 caused the number of very hard levels to decrease to four. They are levels 565, 566, 567, and 573. After some redesigns, only one remains: 573.
- This episode's background, map texture and story is reused for Marshmallow Mansion.
| Candy Crush Saga Reality episodes |
|---|